Home / posts / A Labyrinth Style Puzzle
A Labyrinth Style Puzzle
How I wrote a simple rotating puzzle inspired by the classic labyrinth/ball-maze design, and what I encountered through the design process.
Reading Time: 12 minsby Benjamin Friedman Wilson,
I wrote up a version of this puzzle back in 2017 for fun over a sunny day, and I had quite a lot of fun with it! The design is simple, but it was still enjoyable to learn on, and a nice way to pass the time. Although the puzzle itself was finished some time ago, I wanted to collect all the details before writing this article.
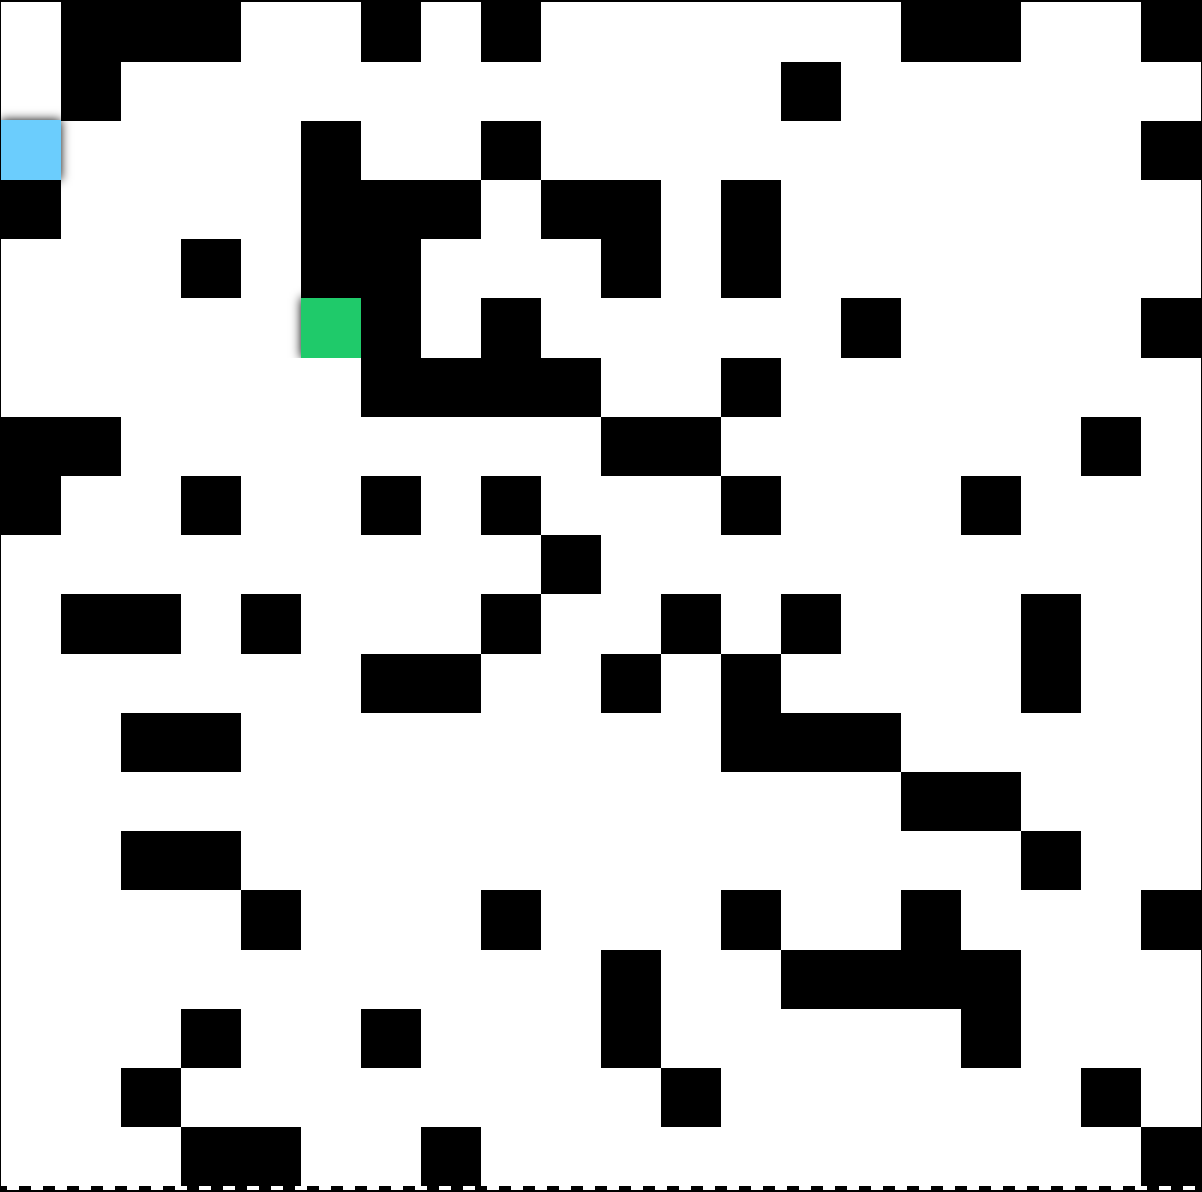
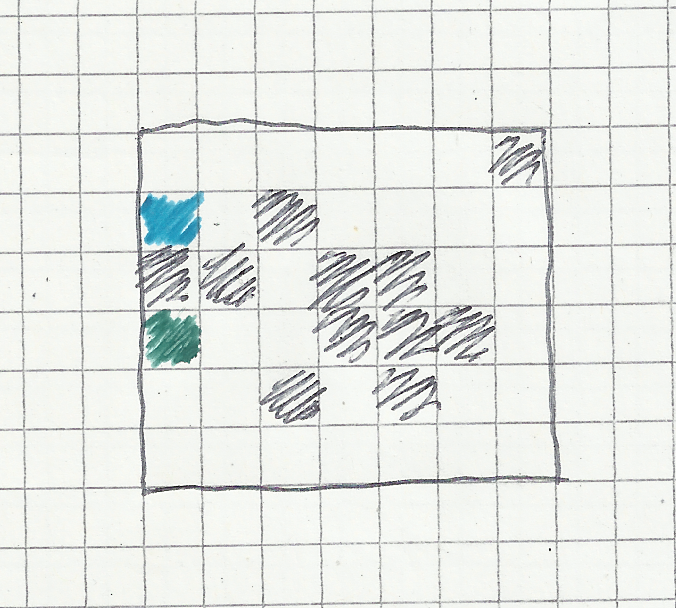
An image of the final puzzle design, with player’s ‘ball’ in blue and the goal position in green.
If you’re looking to try out the puzzle first, you can click here to play it now. I’ve setup a simple stepping of 10 puzzles, starting at the easiest difficulty and gradually ramping up to something decently challenging.
In the following article I’ll elaborate on some background regarding the idea and design, how I built the puzzle, and where the process led me. Overall, I found the whole experience very interesting, as I had never written up an HTML5 game from scratch before.
The Idea and Design
It’s been almost 5 years ago since I decided to start writing this puzzle, making it a bit difficult to recall all the details.
What I do remember was the idea: to make a fun, simple puzzle that inverted the traditional ‘player moves in the puzzle’ mechanic. I remember being inspired by the design of labyrinth puzzles and ball-maze puzzles. If you’ve ever tried one of those then you already have a good idea of what I’m talking about.
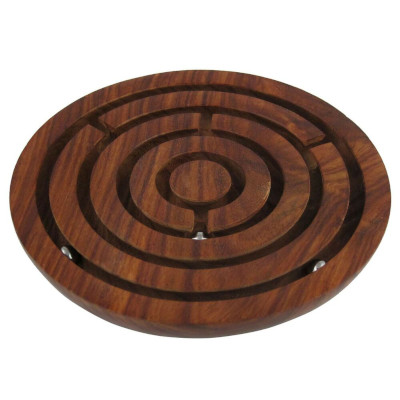
An example of simple wooden labyrinth puzzle, from the Shalinindia Store on Amazon.
I figured it would be a good exercise to try and capture that same experience in a single web page. In doing so, I had to determine what elements I wanted to capture and how.
It made sense to first quantize positions rather than to try and represent all possible positions on a board – as is the case with the original game. If I could still captured the navigational ‘feel’ of rotating a puzzle around, then this would be an okay choice. What I did lose by doing this was the flexible nature of those puzzles, where small movements can have a big difference. To me that was important, but I decided to eschew the extra motion in favor of a simpler left/right rotation. In choosing to take the simpler design route, I could represent a puzzle and its solution as a combination of rotations. No need to do a physics simulation to achieve the same effect.
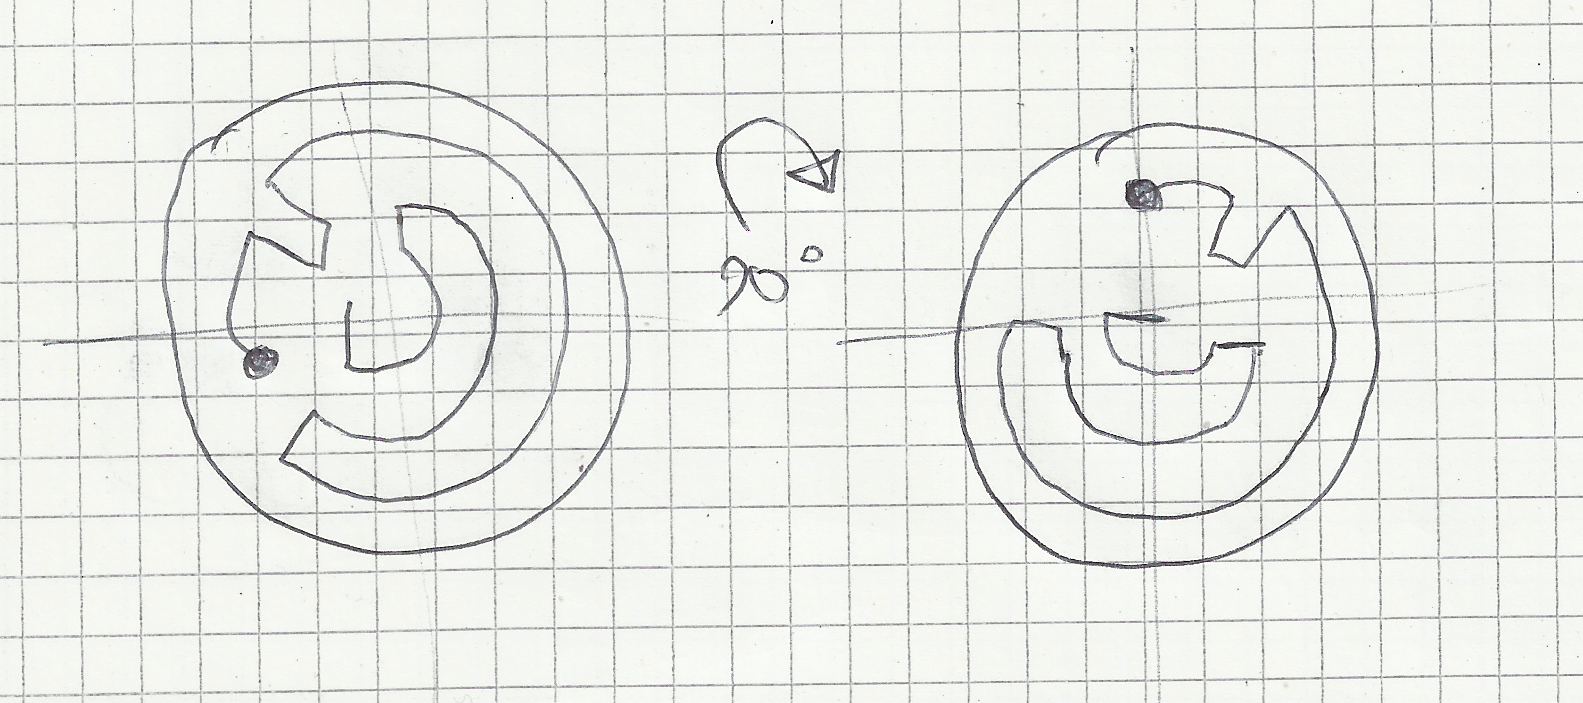
A sketch demonstrating what left/right rotations would mean for this puzzle.
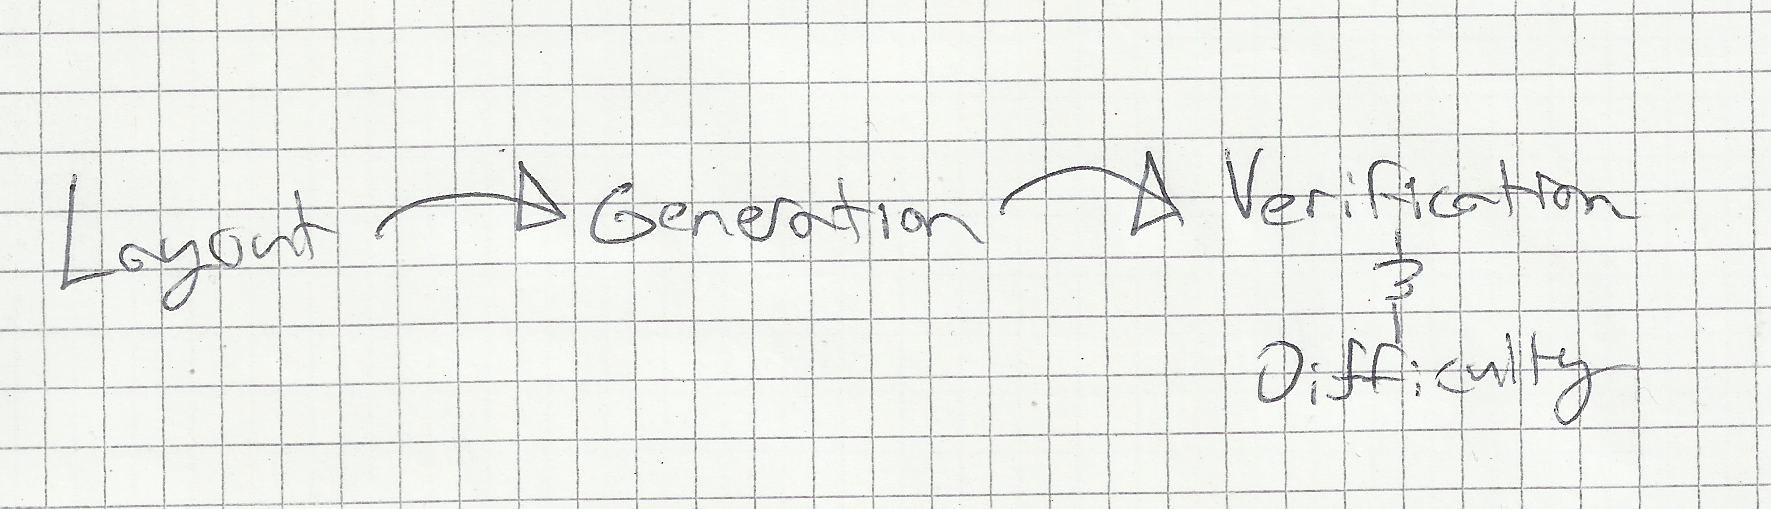
I also knew early on that I wanted to be able to quickly generate new puzzles of varying difficulty. I figured I could do this via a search algorithm, but that it would be best to first focus on generating puzzles – and to resolve difficulty later. Once I got to the point of establishing puzzle difficulty, my plan was to integrate search to guarantee solvable puzzles of a given difficulty.
An example of 3 puzzles of increasing difficulty.
In general, I found it very enjoyable to break a problem like this into several smaller ones, solving one step at a time and building them back together to finish the task. It makes for a more fruitful end result, a more relaxing process, and is a good skill to use for projects in general.
The steps I had planned out for building this puzzle.
Building the Puzzle
To begin the process, I thought of some technologies that I could use to build such a puzzle. I was able to lean on my prior experience building full-stack applications, and plenty of front-end experience too. So, I decided to implement this puzzle as a static web page. I went with the usual HTML/CSS/Javascript approach to build up the components of the puzzle. I could have used WebGL to implement the puzzle, but I wanted to see if it could be done – and done reasonably – in HTML with CSS animations.
I didn’t go with a front-end framework like Vue.js or React, and instead stayed with plain Javascript (generally ES5 and up). There was no particular reason for this, just a personal preference. To me, this was an experiment, and so I wanted to see how this would work without adding in too many other dependencies. As problems popped up, I figured I could then look towards frameworks to solve them later on.
When I started designing the puzzle I knew I wanted it to run on a single web page with a simple interface. When I thought of how I could design this visually, I actually thought of a crossword puzzle. I noticed the same arrangement of black and white squares could be used to represent quantized positions. White squares would be akin to open spaces, forming paths, while black squares would be barriers in the puzzle. My first approaches produced layouts that looked exactly like a crossword puzzle, much like the cover image for this article above. Puzzles in this style were also pretty straightforward to generate, suggesting that I would have an easy time manipulating puzzles further in the design process.
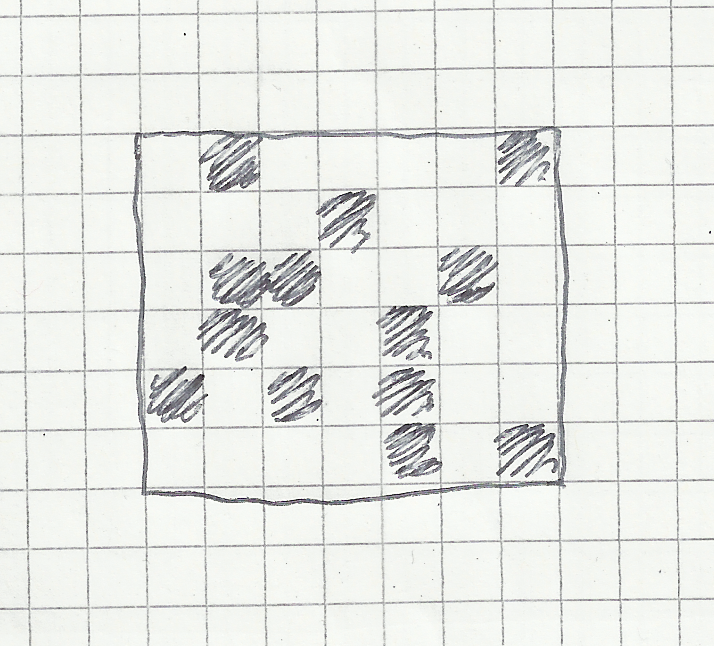
Choosing to have a crossword puzzle look for my puzzle layout.
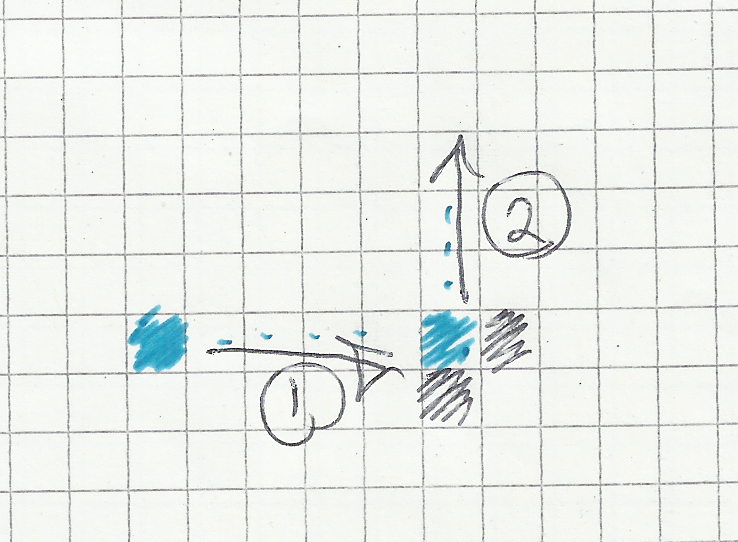
Next, with my puzzle layout chosen, I chose a square ‘space’ to represent the ball. This matched nicely with the geometry of the puzzle, and could be de-marked by a different color (I went with blue). This allowed me to easily fit the player into the more discrete representation that I chose for this puzzle. Since the representation I had so far was 2 dimensional, I limited the rotations to simple 90 degree turns in the XY plane. This gave me simple rotations for a simple puzzle, where I could ‘simulate’ the player’s square moving down at all times as the puzzle rotated around. To fulfill the objective of the puzzle, a goal space was added in green.
An example of a puzzle with a player and a goal.
Once the rotations were in place I quickly realized that made the puzzle a bit disorienting. After only a few rotations in either direction, it was difficult to determine the original orientation of the puzzle. For smaller puzzles this wasn’t too problematic, but as they became larger it was increasingly more complex to track orientation over rotations. Thankfully, the solution that I came up with was pretty simple, not too different from a compass mark actually. I added a dashed line to de-mark the bottom of the puzzle in the starting orientation. Once this was present, no matter how many times the puzzle was rotated, it was easy to determine ‘how’ the puzzle was rotated in relation to where it started at.
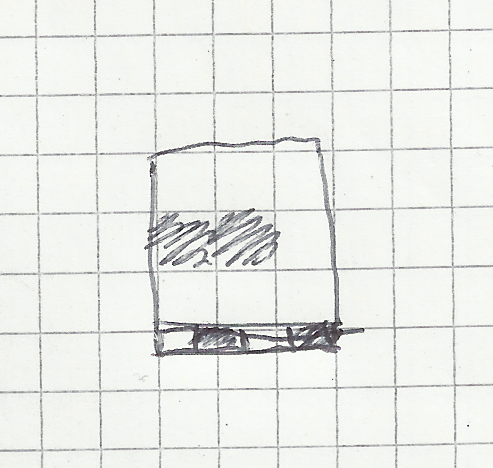
A crude example of a dashed marker to denote the bottom of the puzzle, to track its orientation as rotations are performed.
Verifying Puzzles
So, at this point I had built up a simple puzzle setup. I had rotations, a start point, and a goal, along with a simple goal check. However the puzzles generated at this point were not guaranteed to be solvable. In fact, while trying things out, I had implemented a page reload to generate puzzles until a solvable one was found. Needless to say, it wasn’t so great to use at that point.
That brought me to the next problem to solve, producing puzzles that are guaranteed to be solvable in a certain number of moves by applying search. In order to do this correctly, I needed to solve a pair of problems:
- How to determine if a puzzle was solvable.
- How to determine the difficulty of a puzzle
Turns out these two problems were capable of being solved together through Breadth-first Search (BFS). Implementing BFS in Javascript was simple enough, simulating a virtual traversal through the puzzle by a series of moves (following the rules imposed by rotations). From a given starting point, if BFS was able to find a path to the end goal, then the puzzle was deemed solvable; easy enough.
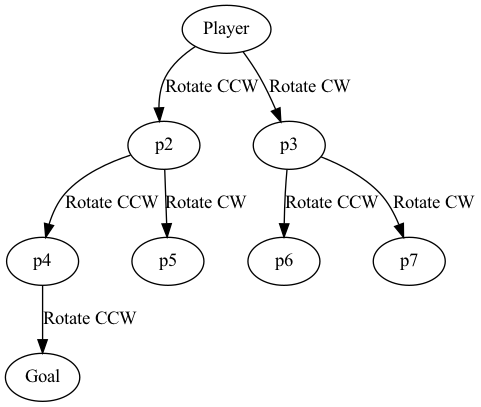
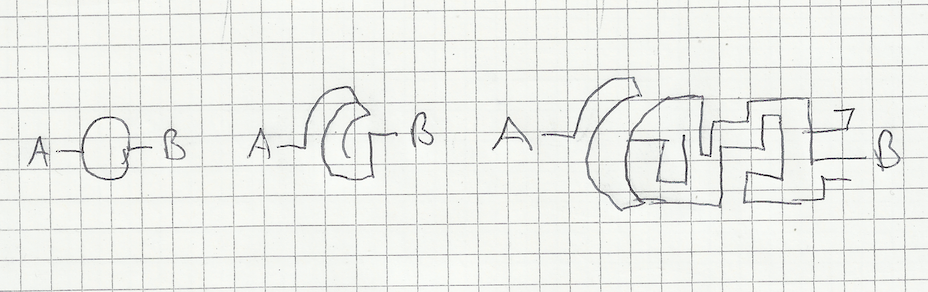
Example of how BFS can simulate clockwise (CW) and counterclockwise (CCW) rotations to discover a solution; where each ‘p#’ represents a unique position on the board.
However, there were some limitations. BFS would only work so long as the depth of the solution space was relatively small – which was the case here (thankfully). In addition, that’s assuming a puzzle has a solution. In the case it doesn’t, the maximal depth that BFS could explore would need to have a reasonable bound. In practice I found that building random puzzles of 10x10 dimensions proved to be rarely difficult to verify or invalidate, making this a non-issue.
This was great, since using BFS would let me be sure that if I did find a solution it was guaranteed to be one of the shortest possible solutions – albeit maybe not the only shortest solution. This also allowed me to determine the difficulty of a puzzle as a function of the minimal number of rotations required to solve it. At this point I was feeling pretty good about the puzzle verification, but it wasn’t my first time doing something like this. I had previously written up a project where I implemented blind search in pacman project that tried BFS, DFS, minimax, and A* to guide a simple AI agent playing the game.
While implementing BFS I did run into a small problem that was noteworthy. On writing this puzzle solver the first time around I wasn’t doing any path trimming to reduce my search space. The result was BFS would almost never terminate, since it could simply loop forever by rotating back & forth repeatedly. This made verification impossible, even for trivially simple 2x2 puzzles. So, I rectified this by adding in some history, and excluded previously visited spaces from being visited again.
At first this worked, and successfully reduced the search space. However, it also excluded puzzles that were still legitimately solvable – being some of the best ones to try out too! I had forgotten to account for puzzles that required 2 rotations to pass through a 90 degree corner. These were valid puzzles, so I increased the exclusion condition to only apply to spaces that had been visited 2 or more times. The first visit would be to enter the corner, and the 2nd would be to rotate out of the corner.
An example of a double rotation through a corner, where 2 visits are required to pass through.
After that I was getting some very challenging puzzles – exactly what I was looking for! This also increased the complexity for verifying (or invalidating) puzzles, but the overall puzzle size kept this reasonably bounded.
An interesting note about this method of verification is that it verified that puzzles were guaranteed to be solvable from a given starting point. It did not guarantee that puzzles were solvable from any point. As an example, a player could perform a series of rotations to trap themselves into a portion of the puzzle that did not have a path to the solution. I didn’t anticipate this in advance, but honestly I was quite happy with it. By making the price of some moves infinitely high (rendering the puzzle incapable of being solved) it created an extra element of challenge in the game. To keep the game going when a player got stuck they would have to reset the puzzle & try again. I found this forced me to deeply consider my moves before I made them, and overall made me enjoy it more than I expected.
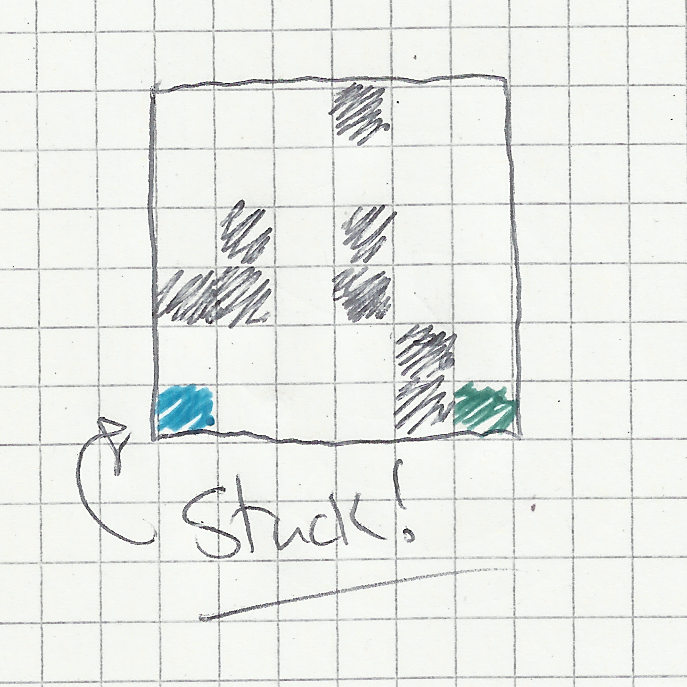
A stuck position, where a solution is no longer possible without resetting.
A Sidenote: Javascript and Random
During this process I was working with PRNGs in Javascript and noticed the lack of a configurable one. I’m a bit embarrassed to admit that I didn’t realize this before, but I somehow managed to work with Javascript’s PRNG over many years without realizing it can’t be seeded – at least not by the user. According to Mozilla’s Javascript docs the built-in random number generator is a PRNG, but the seed is chosen by the underlying implementation and not settable by the user.
For my approach to work, I needed a seed-able PRNG so I could discover & then regenerate the same puzzles repeatedly. It turns out you can write up something that acts a PRNG without too much difficulty, where even a relatively decent hash function would work for something non-critical like this. Rather than write one up myself & try to achieve an ideal distribution, I found an implementation of the Simple Fast counter PRNG (SFC32). I was able to plug this into my implementation and get a decent 128 bits of state. SFC32 comes from PractRand, but the beauty of picking a PRNG is that there’s so many choices. Depending on what properties your application requires, you can pick and choose the right PRNG for your case, or even multiple for different parts of your process. I picked SFC32 based on its speed, decent state, and the fact that it passes PractRand’s suite of tests.
Although I didn’t use it here, I would also recommend checking out the PCG Random family of PRNGs. PCG Random was written up back in 2014, but it makes for an excellent read. I find that I keep coming back across it when it comes to implementing PRGNs, and it was one of the first implementations that I seriously read into.
At this point I was pretty much done, and went to writing up the post that you’re reading right now! The last additions were to wrap a simple interface around the puzzle to describe how to play it and progress.
Final implementation of the puzzle.
Final Thoughts and Considerations
With the puzzle done I’ve had a lot of time to reflect on the process, and to think about what was most notable to me. I’ve done a lot of front-end development over the years, but I’ve only done a handful of game related projects. With that in mind, these aspects stood out to me:
- Going with HTML and CSS for an interactive game works great for discrete implementations.
- BFS gives an easy way to verify that a problem is solvable and has a minimum difficulty
- Not having a seed-able PRNG wasn’t a problem, given that all the elements to create one are already present. If you’re interested in Javascript’s PRNG situation you can also check out Mozilla’s docs for more details.
- Writing this up took way more time than I expected, probably because the time from implementation to documentation was so far apart.
Anyways, I hope you’ve enjoyed this read, and if you want to play the puzzle now you can try it out here.